I really, really love the midi dress look and I emphasis the word look because the way a midi dress looks on a model (stunning) is not how a midi LOOKS on me. The models’ curves (or lack of them) are perfectly highlighted in the form fitting style of a midi and the length accentuates their slim legs. I don’t know if I really thought that I would look the same as the 100 pound 5ft 9 model did in the same midi.
Here is the midi dress I purchased:
Asos Midi Cami Body Conscious Dress
but…SURPRISE! I didn’t look anything like the model. It accentuated my curves alright, every friggin nook and cranny was on display. It probably didn’t help that the midi I bought was thin jersey fabric, which is probably one of the least forgiving fabrics there is. So I buried the dress in the back of my closet and tried to forget I ever thought I could pull the look off.
The thing is…I’ve never liked my body, but I also think most women in America have struggled with loving and accepting their bodies at some point. I’ve been working up to writing about the journey I am on to loving myself and it’s been a long, bloody battle for me but….(and I swear all this has to it has to do with the midi dress!)
But since I turning 30 this year, it really hit me how much of life I have wasted and how many experiences I missed out on because I’ve been to busy disliking myself and caring to much what people think.Doing these self-absorbed, materialistic Personal Style posts was a coconscious decision of mine to do what makes me happy and to (try) not to worry about whether or not people like it. Also, it’s nice to actually start caring about myself again 🙂
So, when cleaning up my closet, I stumbling on the crumpled up midi dress of disappointment and gave it another go (outfitted in my spanx body armor) and decided to give it another try and I came up with a few different ways to wear a form fitting midi with more confidence.
#1 Oversized Cardigans like this one from Revolve Clothing, are your friends.
Wearing a big, drapey cardigan helps me feel like I have a layer of protection and it keeps all my lumpy areas that I am self-conscious about covered. But the open front still shows off the cute length and style of the midi.
#2 Wearing shoes with heels (booties are my favorite for winter) add much needed length to your frame.
Here are a few pair of booties that give me the warm fuzzies and that I think would look good with a a casual style midi dress:
Most midis cut off at around calf-level (depending on height) which I love but also has the tendency to make legs look shorter and bulkier.
#3 Layer it up to create different looks.
A midi is fun to play around with different looks and is a versatile dress that can be simple and classic or fun and trendy. Adding colorful layers, like my favorite crazy plaid pants, creates lines, and helps to “distract” the eye from those worry areas.
A split sided basic top is perfect to throw over a midi because it covers my least favorite areas (my tummy and the booty) and I like the look it creates.
#4: Spanx is also your friend.
Good ole trusty spanx, instilling confidence into the self-conscious since the dawning of time.
I can’t help that my natural artistic impulses are the same as every 2 year old who has just been given their first ever box of crayons (to take all the colors, smash them together, color all the paper, mess all over the floor and then take a nap curled up in the eye of the hurricane). I swear I have every intention of trying to become a decent artist when I get out my graphite pencils and little eraser to practice sketching. Somehow though, I always end up on the floor surrounded by paint in every color and shade available. But Im at my happiest and most inspired making my kaleidoscopic messes…
I happened to spot the inspiration for this DIY art project in an advertisement in House Beautiful magazine for minted.com. I ripped it right out (don’t worry, it was my copy!) , taped it to my wall and started to go to work on my own version. Later, I was able to investigate further and discovered (thank you pinterest) that the Artist’s is Yao Cheng, she specials in beautiful watercolor paintings and her online store on Minted’s website is FULL of stunning watercolor prints. The above piece and the object of inspiration is “Hexagon Cluster,” and you can purchase her Limited Edition of Hexagon Cluster print on Minted (or click through the links) for anywhere from $20 to $200 depending on size and finish.
Here is everything you will need to make it:
1) watercolor paints (the Kids Crayola watercolors work just fine) and paper (brushes and cups of water as well)
I suggest the following liquid watercolors for bright, vibrant colors:
Sargent Art 8-Ounce Watercolor Magic Set (10 different watercolors for $49.95)
click on picture to view in Amazon
or Dr. Phil’s Concentrated Watercolors (my personal favorites) They average about $5.00 a bottle or a set of 14 is around $69.99.
Dr Phil’s Concentrated Watercolors (click pic to view in Amazon)
2) Watercolor Paper Pad
For the best price and quality, I suggest Strathmore 360900 Cold Press 140-Pound 12-Sheets Strathmore Watercolor Paper Pad, 9-Inch by 12-Inch, which is only around $7.00, also available on Amazon:
Click photo to purchase in Amazon
3) Thick, heavyweight white paper Mixed Media paper works well, just something to hold the weight of mixed media and glue without tapering.
4) Scissors and a gluestick!
The How To:
The steps to making this DIY project are super simple. But since I’m not sure of how the original artist created her stunning piece so I’ll tell you how I made my version.
1) Get out your watercolors and watercolor paper and go crazy (this is one of my favorite things in the world to do). You don’t need any fancy paper or expensive watercolors. In fact, I mostly used plain old, reliable Crayola Washable Watercolors (available in probably every single pharmacy and grocery store in America). because I had just moved to Grand Rapids from Chicago when I got this project itch, I had none of my supplies and couldn’t wait a few days till I went home again.
* Try experimenting with colors…I love playing with colors and mixing and matching up colors I wouldn’t usually put together while doing this…I tend to lean towards bright, bold, colors but what I love about Cheng’s is that she uses subtle, subdued colors with a pop of bold color that makes the piece stand out. Her use of subtle tones and light/grey hues accentuates the rich blues and the subtle use of warm orange colors all come together to create a vibrant, yet refreshingly simple and peaceful piece of art that would compliment many differently styled rooms.
2) Using a ruler or something to help you draw straight lines, trace out 20-30 hexagons (6 sided shapes). Make sure to make all different sized hexagons..the sides don’t necessarily have to be symmetrical or have all equal lengths..this will help to add to the abstract and organic feeling of the piece.
3) Arrange them in a way you like on your heavyweight art board..the only rule I used for myself was that each shape has to be touching another shape by at least one point..I think this helps adds continuity and fluidity of the artwork and helps guide the viewer’s eye from each unique hexagon to the next.
I also tried another technique and did one piece where all the sides of the shapes had to be touching sides perfectly..this one took a little more time and a lot of cutting down shapes to fit better…
4) admire, frame and hang!
Here are a few that I did, as you can see, I have a hard time using natural and subtle colors- which I think makes my finished pieces a little to “in your face.” But to each their own!
You don’t know how long I’ve been waiting to use that title!
Maybe turning 30 brought some maturity to me finally, as seen in my new found love of all things plaid.
I don’t know.
But I do know that before this winter I have never preferred Plaid or any other “Classic” styles. But as in most things with me, I always go overboard with any new interest of mine, Whether it’s: painting, DIY projects, yoga, or clothing, I suck all the fun out of whatever it is I like, until I am sick of it. That’s probably how my new love of “Plaid” will end up, but for now, me and plaid are BFFs.
I have seen so many cute plaid scarfs, hats, and ect. on my friends and people I see out and about, this winter that I wish I could have taken pictures of some people I saw who inspired my new obsession for plaid. If anyone has any pics of them wearing their favorite plaid accessory or clothing item to add to this post, or your opinion on plaid, my email thiswildpreciouslifeblog@gmail.com and I will add it!
But For now, here are some of my favorite plaidy plaids…
I’ve got a little pooch belly, but hey that’s okay!
Skirt is from Charlotte Russe ($19.99 or buy 1 get 1 for $10.00) which I bought in store and couldn’t find online but they have a similar one online (for $19.99):
Knit short sleeve white top is from H&M from this summer but I found a similar top from H&M that I actually think would look better with the plaid skirt. Their Heavy Jersey Fabric Short Sleeve Top available online in black or light grey for only $17.95:
The boots I bought at Target, probably 2 winters ago, and are still my tried and true favorites (plus the heels are about 2″ so I can actually go wear them out without walking like I am on stilts ) I love the contrasting brown leather ankle strappy things that make it okay for me to wear with black or brown (at least thats what I tell myself..fashion experts would probably say different). But I found a very similar pair by Dv by Dolce Vita Brand, called their Jaxen Suede Booties available at Lord and Taylor online and on sale for only $64.48 (marked down from $128):
and if you’re a big spender I also love these similar Rag & Bone Harrow Suede Ankle Boots available on their website for $370.00. (I can dream, right?)
My second “Plaid” winter outfit, is mainly just these pants I found at Forever21. I bought them online, (Got super excited and actually bought two of the same exact pair..so if anyone is interested in a free pair of pants…email me!) A lot of my style decision thought process goes something like this: “Should I really be considering wearing this?” “I look ridiculous.” and finally “Oh well, who cares!” and then proceed to checkout. And so it was with these pants:
These Gingham plaid pants are available at Forever 21 currently on sale for only $16.99. But aren’t for the faint of heart, I’ve got some junk in my trunks and these pants def. don’t help to conceal that. But they are red plaid pants for under $20 so…
Thanks for sticking around to read this extra long post…as always I would really, REALLY love to hear and see what you guys are wearing this winter. Email or comment below.
I spent longer than I should have trying to fit as many words starting with the letter “F” in the title.. (Ill save you the counting: it’s four). I’ve been waiting alll summer to write this post. Because Autumn is my favorite. I’ve seen this Someecards Ecard floating around online the past few weeks:
And as a white girl who likes her yoga pants (they are comfy and stretchy!) I have several objections. First off, I don’t think an individual’s avid appreciation for the Fall Season has anything to do with the fact I am a white girl who likes her yoga pants on occasion (so comfy and stretchy!). Secondly, I don’t even like Pumpkin Spice Lattes (pumpkin candles, loaf breads, muffins and pancakes are another story). But, I will tell you my favorite things about Fall without you having to go through the trouble of saying “Pumpkin Spice Latte” 3 times. (Who’s the weirdo now? At least Im not the one talking to my mirror…amiright?)
I was thinking about what it was that made me love Autumn so much and I found this “Autumn Blessing” Affirmation on pinterest that resonated with me:
I never realized before that all the changes in nature that Autumn brings; (the crisp weather, bright colored leaves, the smell of firewood burning that permeates the air) really does represent a time of transformation and reflection. As a very sensory and visually orientated person, I appreciate the transformations to my physical environment that Fall brings. It forces me to acknowledge the passing of time, every time I walk outdoors. I appreciate the Autumn season even more after being in Southern California for four years while at school. Looking back at that wonderful life experience, it feels like one really long summer and its difficult for me to remember exactly when my favorite and most precious memories occurred. While the winter season is a whole other beast here in the Midwest, I’ve come to relish the Fall season even more.
Besides the beautiful weather (and the dozens of colorful leaves I find and put in my coat pockets and forget about and then spend the rest of the year pulling crumbled up bits of dried leaves out of various pockets) the other reason I love Autumn is for the fashion!
Maybe its because I remember all those end of summer clothes shopping excursions with my mom trying to pick out the perfect outfit for the first day of school, or maybe it’s because I spend my entire summers sweating through everything I wear the second I step outdoors and I’ve never felt comfortable in my skin in a summer wardrobe: shorts (the chafing!), bikinis (the shaving!) and tank tops (the arm jiggles!). I am much more comfortable covering up “all that” in scarves and over sized sweaters.
As usual, I got sidetracked on what was supposed to be a short intro into the main subject of this post: my 6 Fall Wardrobe Essentials.
I decided to make an inspiration board using my illustrations so here we go:
My Fall Wardrobe Essentials
1. Leather (or Leatherette) Moto Jacket:
Not so heavy or bulky as a winter coat and as the outermost layer of clothing, it’s the important in making a “style statement.” With oversized cardigans and slouchy, drapey sweaters and not to mention scarves, a simple, classic and fitted moto leather jacket keeps me from looking like a chunky pumpkin.
for (wait for it, wait for it) $890. I love everything about this jacket (the dramatic, asymmetrical collar or oversized lapels) and the color. And if I was in a position to buy it, I would and probably never take it off.
available at Urban Outfitters for $98.00. And it’s VEGAN, so you can feel good about not harming animals while wearing it!
2) A Bold (Tribal Inspired) Statement Jewelry Piece:
When I’m browsing for clothing or jewelry online, I always, 100% of the time, go with the more outrageous, the more colorful and bold option. Should a 30 year old be purchasing leopard print jeans? I learned the answer (it’s a big NO for me) when I showed up to the elementary school I was teaching at, only to run into 7th grader wearing the same exact pair as me (she was embarrassed, I was like “twinsies!!) At these moments, I question my sanity and resentfully acknowledge my actual age. (I am 30, I am 30, I am 30). I am learning the beauty of simplicity but this is not one of those times. I give you the aptly named Falkor necklace from DylanLex.com…
and my reaction to seeing this necklace for the first time can be summed up in the following picture:
and the Falcor necklace can be yours for only $980.00!
aaaand that’s the face I made when I saw the price.
Or you can do what I do, to wile away the hours and find some original and tribal inspired statement necklaces over on my favorite site on the web, etsy.
3. Boho Leather Handbag
Just recently I have re-fallen in love with bucket bags and leather backpacks as well as vintage tooled leather bags as well. I have been debating on fringed leather bags for years now and I still like them, although, they are becoming part of that festival season uniform- but my eye is always drawn to them.
Madewell makes a classic and simple style leather backpack- I don’t know why, but almost every leather bag I have ever owned is this carmel color. It’s definitely my favorite and saves me from having to decide wether to go with black or brown.
Urban Outfitters has the perfect combination of the fringe that I hate to love and is also a rucksack/bucket bag, the Cruz Studded Fringe Bucket Bag, and is much cheaper find at $54.00 and is also available in red and blue!
I also love the vintage fabric woven tote/bucket bags/leather backpacks but have yet to find a patterned bag that is also a designer brand Etsy and Ebay are my stomping grounds for those unique and beautiful finds and the best part is they are usually one of a kind!
My heart skipped a beat when I saw this woven, Ikat, bucket bag on etsy:
whew, sorry this post is getting long! thanks for sticking with me.
Fourth on the list of Fall Wardrobe Essentials is….
4. Oversized, Slouchy, Sweater or Cardigan:
My two personal favorite sweaters of this season (as well as the color contrast jeans) are both from H&M. Although not everything is carried in their online store…
The Oversized Sweater is available online in both gray and navy blue for an absolute steal of $14.95. I love this sweater and am so glad it caught my eye, although I have to admit , I would have passed it by if the mustard color version hadn’t caught my eye in the store. I love the length and the lightweight texture. I also am a big fan of contrast colors (as you might have guessed) but the black sleeves are definitely pleather and not very breathable.
And here is the dark blue version also on sale for $14.95. I love the leather pants and really would like some of my own (imitation leather of course) but let’s hope this beautiful model’s leather pants are not made of the same pleather material as the sweater, or she is definitely sweating it out. What do you guys think about leather pants? Do you own any?
My second favorite oversized sweater is also from H&M, the Ribbed-Knit Sweater, which I got in Orange and is also nicely priced at $24.95. For the low prices, I am impressed with the quality of the garments I have purchased from H&M.
and just cause a girl’s gotta dream about overpriced clothing items I will never be able to afford way out of my reach… my ultimate dream sweaters are both from Acne Studios (one of my new favorite “Dream” brands).
The Galactic Turtleneck Sweater is available at Barney’s New York and Also Acne Studio’s website for $620.00.
oh boots, bootie, boot, boots. I love boots….I can never have enough. What is it about women and their love for shoes and handbags? I don’t know, and don’t really care. In the past, I have always gone for tall, knee high length boots, but in recent years I am drawn more and more to ankle boots.
Basically every boot that Anthropologie has on their website is amazing. Their whole selection of boots, booties, ect, are kick ass, and usually always are.
I love the triple buckles and the price of the Vendaveles Boots (available exclusively online at Anthropologie) for $150.00.
Since I am loving anything and everything color blocked this season I love both of these booties from Anthropologie:
and the Coromell Booties, $130.00, also available exclusively online at Anthropologie as well.
FINALLY!
#6: Patterned Fitted Pencil Skirt
Goes well with an oversized sweater, tights and booties. And again, anthropologie stuns with their patterned pencil skirts:
Perhaps my favorite skirt at the moment (which I am currently trying unsuccessfully to persuade my boyfriend to buy for me for our 2 year anniversary) is this beautiful Tapestry Pencil Skirt, $98.00 from Anthropologie, available online and in stores.
I love the longer length of the new pencil skirts, like this Collection Stripe Skirt, from J.Crew for $128.00, but on sale right now for 25% off using the code: SHOPFORFALL.
Thank you for sticking with me through this incredibly long and incredibly materialistic post. I hope you all take the time to enjoy the first official day of Fall tomorrow.
See what I did there…With the title? Yeah, I need to get out more. Before I start in to my epic blue hair adventures, I just want to thank all of my friends, family and anyone else out there who read my last blog post: “Blessed are The Cracked…” I struggled with posting it for a long time, as it went deeper than I usually go.
But when I posted a link to the article on my Facebook page (in an outright act of shameless self-promotion, and deleted it twice before I left it there) I was so blown away by everyones kind words and encouragement. I was walking around glowing for the entire day and it was such a boost in confidence that Im surprised I didn’t sprout peacock feathers out my bum! So thanks again.
Anyways, onto my latest mishap.
so this happened…
blue hair, don’t care (but kind of do!)
I have been toying with the idea of dying my hair some crazy color for awhile now…and as a lot of my more hair-brained (pun intended) ideas begin, I was up reeeaaally late on pinterest where I created a board just for my crazy hair color inspirations and pinning away.
Now, I will be the first to tell you, that I get quickly excited about ideas and don’t always think my them through. I just get caught up in the moment and fail to think clearly.
I convinced myself that I was mentally prepared to dye my hair because I went so far as to create a profile on Taaz.com (a website where you can try out different hair styles and make up using pictures of yourself). My idea of “thinking this through” was to upload a picture and try out some different hair styles. I promptly found and tried the only blue hair color style available, (on the gorgeous katy Perry). This is the picture they had:
Katy Perry’s blue hair
Gorgeous right? Yeah. Aaaaaaand well, here is how mine turned out….just in case you haven’t laughed today…
hahahahaha
Me and Katy are practically twins! But really, the website was actually really great and these “virtual makeover” websites have come a long way in the years since they first came out and I did it in high school, a good 15 years ago (and I am glad those photos can never be unearthed). Taaz.com, allowed you to contour the hair style to fit better onto your head (as my head is huge and round like a basketball). but I wasn’t done yet! so my next step was to download a free iPhone app called Make With Beauty that allowed me to take a picture of myself and change the color of my hair already. I couldn’t figure out how manipulate the hair color effectively in the app and my hair always ended up looking like it would glow in the dark. but the idea was to see what I would look like with a lighter shade of blue:
Looks like I dipped my head in some radioactive goo…A little to neon/glow in the dark for me- but still closer to what I wanted.
so by now I was getting pretty pumped up about the idea…Maybe a little too excited because following morning, I woke up and went straight to Ulta, where I hastily picked up a bottle of Jerome Russell’s Punky Colour in turquoise for only $9.99.
And here is when things get sketchy…
in my haste/over-excitement… I didn’t read the directions or the label completely and carefully and what I thought was NON permanent was actually SEMI- Permanent (the back says 5-40 washes).Which is a problem because I needed my hair to be back to a natural blonde hair color by the following week for work.
The directions said to leave it in your hair for 20-40 minutes and since I wanted a lighter color of blue (that would wash out quickly) I left it in for only 15 minutes. Little did I know that my hair was the PERFECT type (damaged, bleached, blonde, dry) to absorb and hang on to allll of the turquoise color.
After I washed out the hair dye, I took a look in the mirror and spent the next few hours washing my hair over and over in a blue blur of anxiety attacks and hyper-ventilating. I called out for help from friends on Facebook and Instagram, and read several articles for home hair color lifter remedies (I wasn’t close t0 being able to leave the house). With friends help and a great article on Wikihow (which I highly suggest looking at if you find yourself in the same position as I did) I tried all sorts of home remedies: soaking my hair in crushed vitamin C tablets, adding dish soap to my shampoo, adding laundry detergent to my shampoo, , adding baking soda to dandruff shampoo and again washing. These helped to lighten the color somewhat but left me with a new and even scarier problem: severe hair breakage!
It was during my cry for help from my friends on social media that my old college roommate introduced me to the amazing Alison and her blog The Alison Show. She had also dyed her hair a similar color, although she went the preferable route: to a hair stylist. She was so kind and reached out to me and said that she too freaked out when she first saw her hair in the mirror but that it washed out so quickly that she wished it had stayed longer.
After 48 hours of locking myself in my house and washing my hair over 10 times, I had resigned myself to my immediate future as a blue-headed smurf.
Within a few days I ended up really liking my mermaid hair and wishing I could keep it longer,
So here are some of my tips for if you want to dye your hair blue, green, pink or any other fabulous combination:
1) always READ THE LABEL carefully!
2) Before doing a semi-permanant or permanent color try something that will wash out in 2 to 3 washes such as:
3) Try out different styles using a smart phone app or Taaz.com
4) Be emotionally prepared!
5) Consider the damage level that any hair dye does to your hair
have fun and dye away. If you have any pictures or stories about your wild hair dye adventures, feel free to email me at ourwildpreciouslives@gmail.com with pictures and your story and I will share it!
Happy Memorial Day weekend everyone! Be safe and have fun!
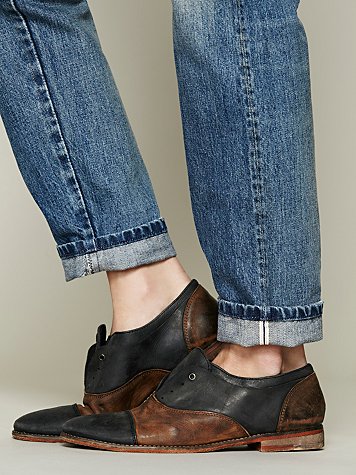
Ever since I was a kid I loved oxfords. I went through a phase where I was convinced 1950’s was the coolest time period for style because of poodle skirts and black and white oxfords (or penny loafers and rolled jeans)! Also, like almost every woman out there, I love shoes. But I also don’t have very much money- so finding a pair I like, are comfortable, and will last, for under $100 is a challenge for me. Here is a round up of some of my favorites…I really love colors and patterns and crazy prints but I also am trying to tone it down and add more pieces to my wardrobe that can go with everything.
my favorite oxfords for Autumn
1. The Free People Galaxy Oxfords probably one of my favorites of the 6 that are pictured, and of course, above my price range. I could only find them for sale on the UK Free People website for 158 pounds which equates to over $250.00. Still, I love how unique they are, and how comfortable they look.
2. Are Nickerie Oxfords available at Anthropologie and also Shoes.com for a much more reasonable price of $37.00 – $47.50. Of course, the only problem with buying these cheaper, cute patterned oxfords, is they are canvas and probably will not last as long as the leather ones, especially in the rain.
3. Are Nomad Leopard Print Oxfords and can be found also at Shoes.com for $49.00. If you like the style, but have a little higher of a budget or want a more quality pair similar to these that will last you longer, then you will probably love these:
4. Are Rocco P. Laced Woman’s Shoes- Camel found at yoox.com for $375.00. I love this color, it’s probably my favorite color for leather shoes because I feel like it can go with almost anything.
as an alternative for a much more thrifty amount of $14.80 (what?!? maybe I will buy these now).
5. My other favorites from the 6 I chose are these awesome Osborn Painted Oxfords , Artist Limited Edition for $168.00.
6. Are another pair of oxfords from Free People. They are the Rogue Darby black and tan and are $135.00.
These are similar to the ones shown in the top picture that I am wearing, but again, the Rogue Darby oxfords are my dream pair but Classified Brand and unfortunately I can find them no where online!
As always, I would LOVE to hear your feedback or if you want to be featured or have a question- hit me! I hope you all are enjoying these final days of summer.
Ever since I had the ability to write (non-sensical scribbles of a four year old count) I have kept a “diary.” I don’t know where the compulsion to keep a list of the daily mundane activities as a child: “Today I had rice crispies for breakfast…” The older i got, the more they developed into a living memory box of my life at that moment in time; and perhaps it started as my first paltry attempt at creating a sense of order from my distracted thoughts and messy brain. I have over 30 completed journals, which is roughly one per year. The style and format of my journals adapts to the seasons of my life. During college and Graduate school, my journal functioned as my day planner and the keeper of my sanity. During periods in my life where I have been happy, I notice that I do more art and very little journaling. During tough times however, my journals are filled with sad song lyrics, to-do lists and life questions.
Do you like to look back at your journals? If so, do you do it often? Is creating a written record of your life to reflect back on a reason for your journaling? I am very interested to know. I can honestly say that, that is not the case with me, as writing for reflection at a later period of time would require to much forethought and planning for me. My journal has become one of my few necessities which I carry with me at all times in my bag. It is given the impossible responsibility of keeping me sane (emotionally balanced and organized enough to survive) ..so when I complete one journal, I see it as a memento of the craziness which is my life- maybe one day, when I am normal, I will want to look back at my journals to feel sorry for my crazy self.
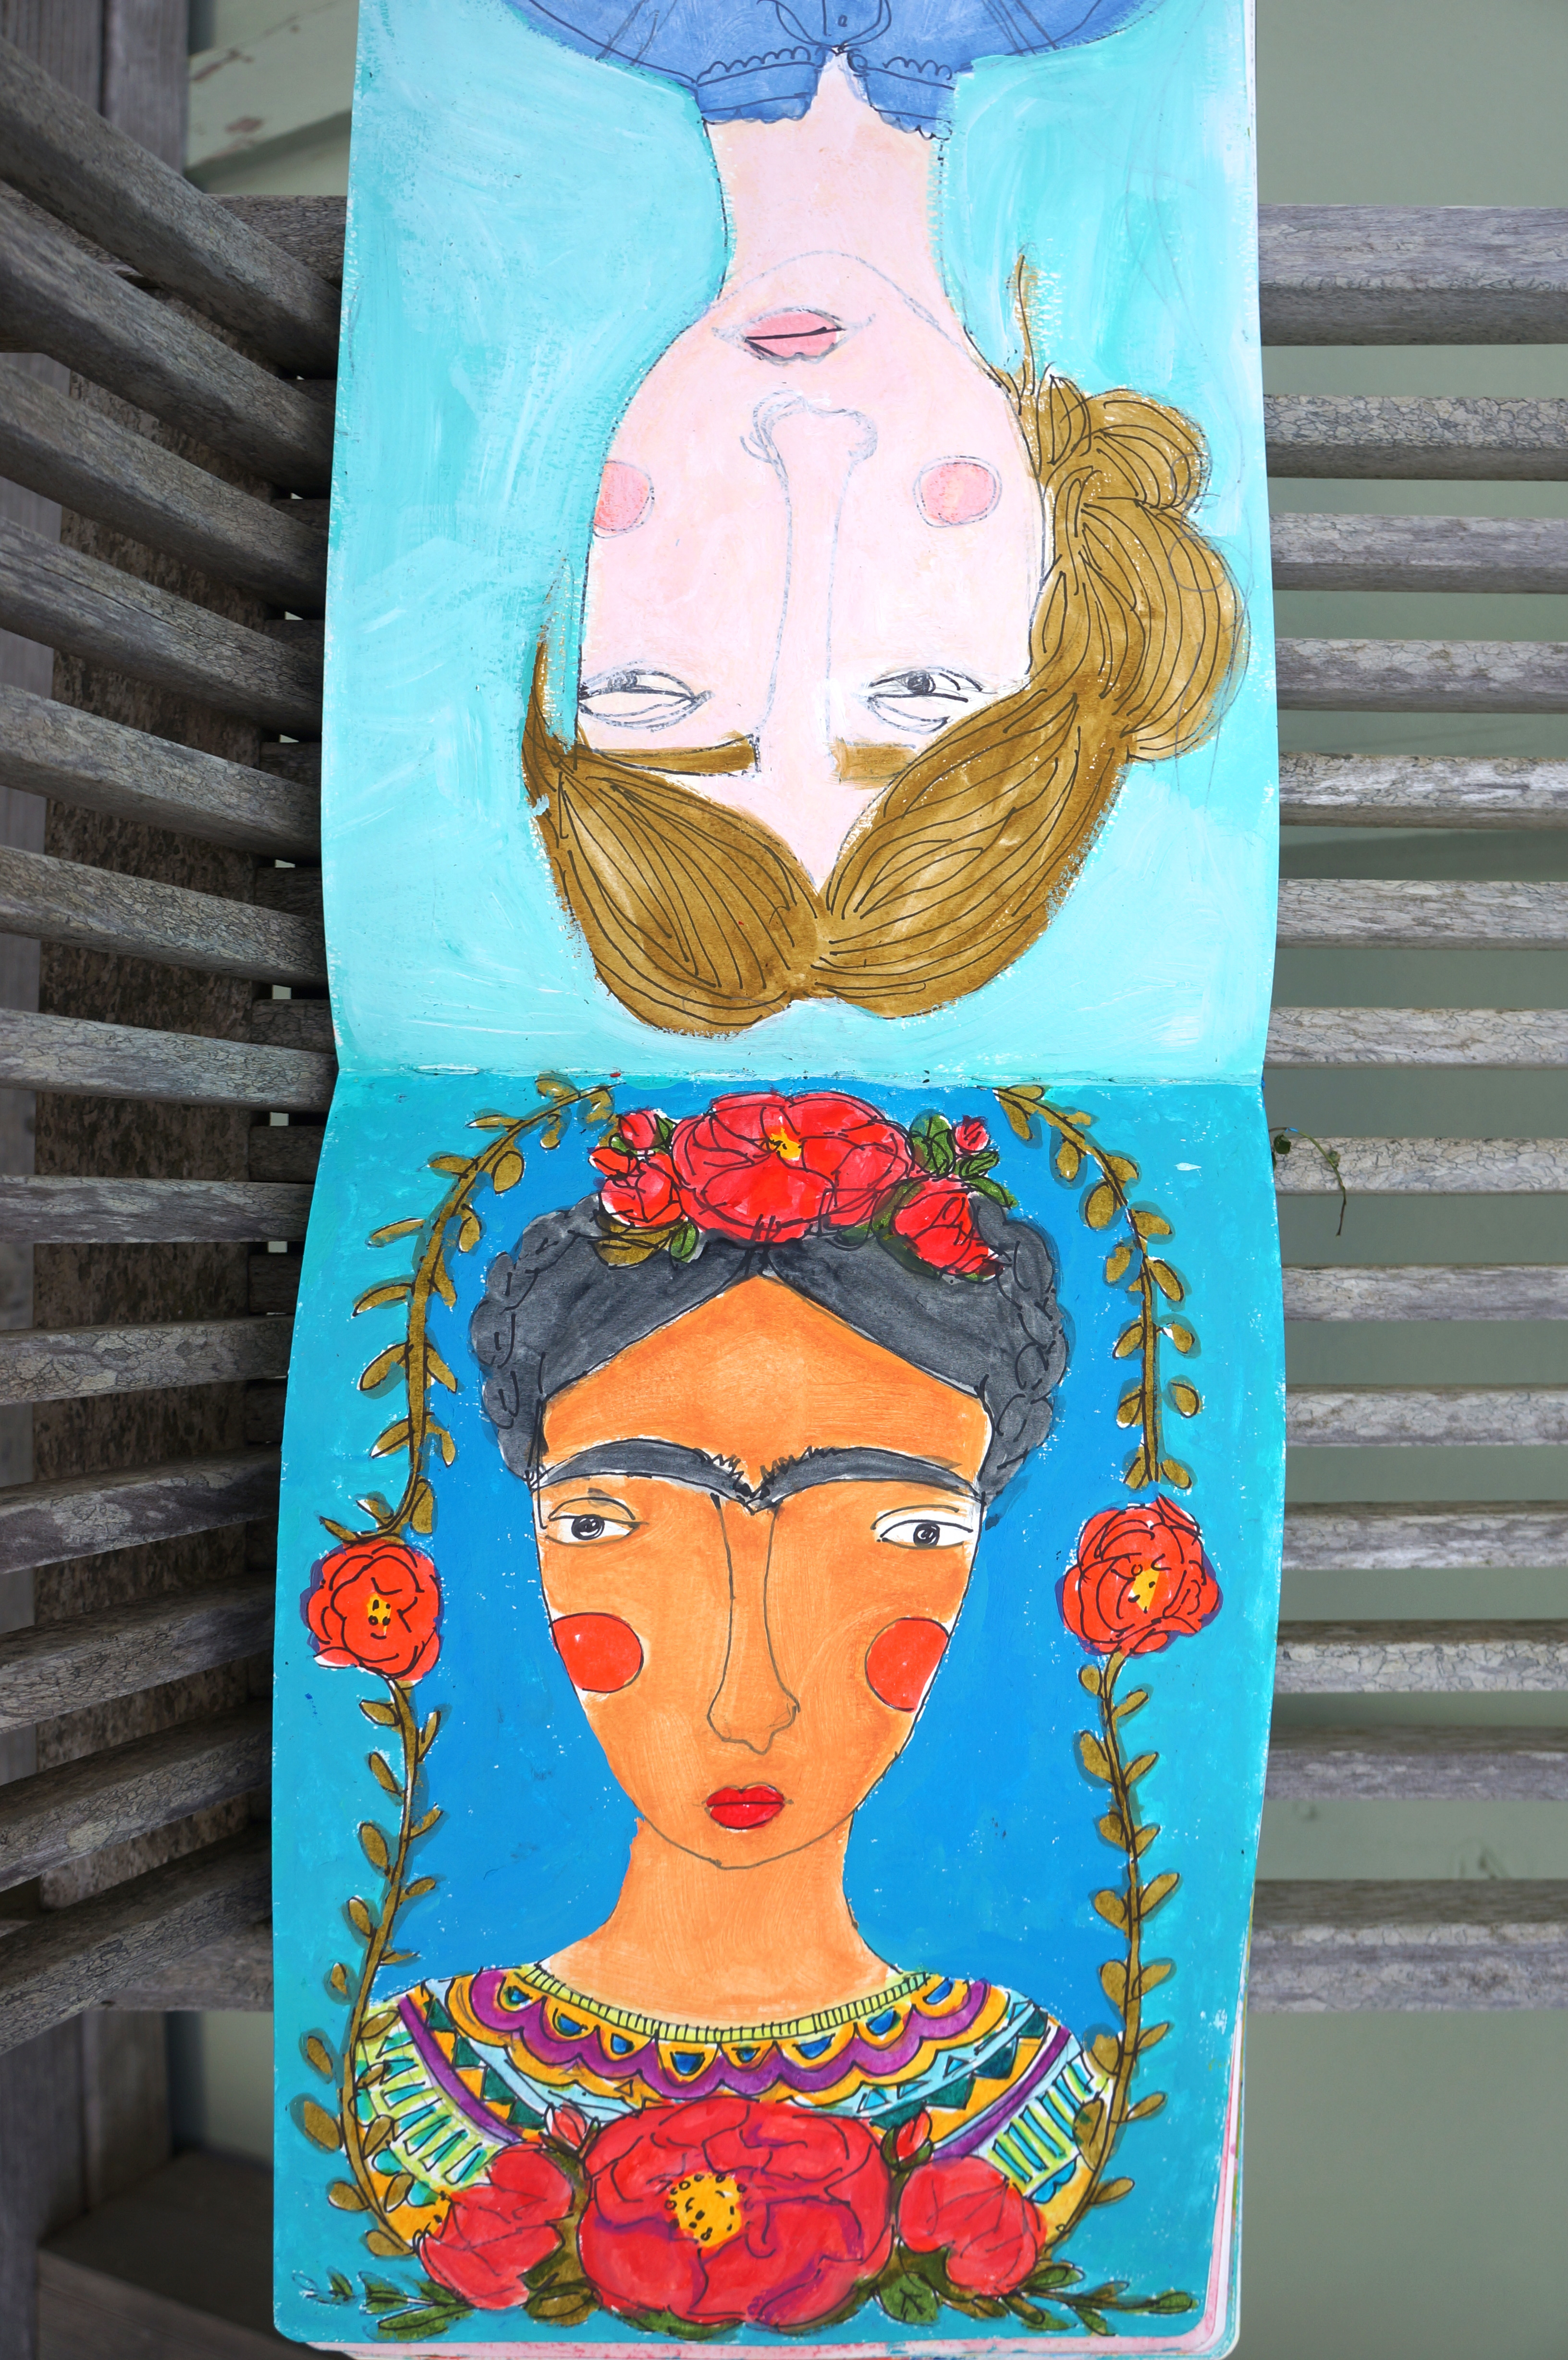
Here are a few of my own art journal pages:
my art journal pagemy colorful cactione of my favorite quotesFrida and Virginia from my journal.
Anyways, I love nothing more than seeing pages from other peoples’ journals. I feel like I am getting a naked glimpse at their soul. I am always so amazed and inspired by the creative, beautiful things that people put down onto pages. One of my favorite artists, Geninne Zlatkis, has the most beautiful and awe inspiring journal pages. I love all of her work and I also LOVE how she adapts her art journal entries into a day planner. Genius!!
from her flickr account (October Days) more of Geninne’s beauty
Here is the link to her flickr account for you to check her out more!: https://www.flickr.com/photos/geninne/sets/72157594514015991/
Another one of my favorites is Guilherme Dietrich. I fell in love with the bright, bold colors and vivid pieces. I had to pick my jaw up off the floor after I saw these. Unfortunately, his flickr account is no longer active and the website I found him on, isn’t either. But here are some of his beautiful pages to feast your eyes at (pangs me to know I will never create something this beautiful)
What inspires you? Why do you journal? I would love to see!
I’ve been doing a lot of journaling lately….I used to do it all the time, and have had a diary or journal since I was old enough to write. But, in the last few years, my journals have gotten less and less inspiring. They are usually filled with To Do Lists, important info, and work data. I wanted to get back to when I used to actually enjoy writing and creating art in my journal. And while, the circumstances for my delve back into my enthusiastic journaling were not exactly positive, I have remember just how much of a calming effect and a release of tension they are for me:
Does anyone else like to journal? Does it have the same effective on you? Send me pics and I will post them on my blog (one day, someone will actually answer me and it will be awesome!)
some art from my journal…I am loving triangles and simple gemoetric shapes right now.
I will be the first to admit, that I rarely, if ever, have a original art idea. I always see pieces that I love and admire, and usually want to buy for my house so I can stare at them forever but cant afford them so I create my own version, and more versions and they are not exact replicas by any means. I don’t think I am an artist, I think I am just really good at copying other people.
I did this one on an a sheet of music from an old family chorus book I got at the thrift store.
This one was with watercolors and sharpie in my journal.
I call this one “Triangle Lady.”
And here are some of my favorite geometrical prints I have found on various sites:
I LURRV THIS ONE: “Sami Woman Print” by lisacongdon
“Her Colorful Coat” Original drawing by heartpumpsart
So, I’ve started my after-school art class at the elementary school where I teach. At first, I was nervously checking the office for completed registration forms and worried I wouldn’t have enough students BUT lo, and behold, I reached my limit of 20 students and went past it, ending up with 24 students in 2nd-4th grade! In our first class, students created their own art journals using the “colorfield” technique of abstract painting and canvas. I found this lesson on Dick Blick’s website. Here is the link: http://www.dickblick.com/lesson-plans/color-field-sketchbook/ The finished art journals should end up looking something like this:
The kids LOVED making their journals but it was a little messy. I spent a good two hours after they left scrubbing the paint from the tables, stools, and floor. So, just wanted to CAUTION you if you plan on doing this with kids (or even if you do it for yourself) you will need LOTS of old newspaper, or trash bags, and paper towels.
So, how to make these lovely journals you ask? All you need are various colors of acrylic paints, unprimed canvas, plastic cups, an empty spray bottle and some paint brushes.
* For each color you want to use, squirt about tablespoon of paint into a disposable cup and then put about a tablespoon of water in the cup (less water for darker colors) and mix with a paintbrush until smooth. Choose 3 or 4 colors you want to use (remember that mixing more than 3 colors together in one place will create a brownish blah color)
* Fill the spray bottle with water and spray sections of your canvas (this will help create the swirly patterns when the colors mix together with the water and the dry canvas).
* Pour onto the canvas!
Experiment with different colors and different “pouring techniques.” Try pouring from far away, to create a splash pattern. Use a paintbrush to flick a spatter pattern, or pour colors, then tip the canvas up, so that the colors create a “raindrop” or “drip” pattern.
* Be careful of using too much water, or pouring too much, because it will pool on the canvas and mix with all the other colors to create an unpleasant brownish color.
I spent way to much time on mine…I used a lot of white paint, because I found that it brightened the colors and kept it from becoming to dark. Here’s how mine turned out….I am sure if I was to make another one, it would be completely different.
I think next time, I want to try a more simple approach; using only 2 or 3 colors and not worrying so much if there was blank canvas.
These are just a few of the outcomes from my students..I love how unique and colorful they all turned out. I can see their individual personalities in the colors they used and how they mixed them:
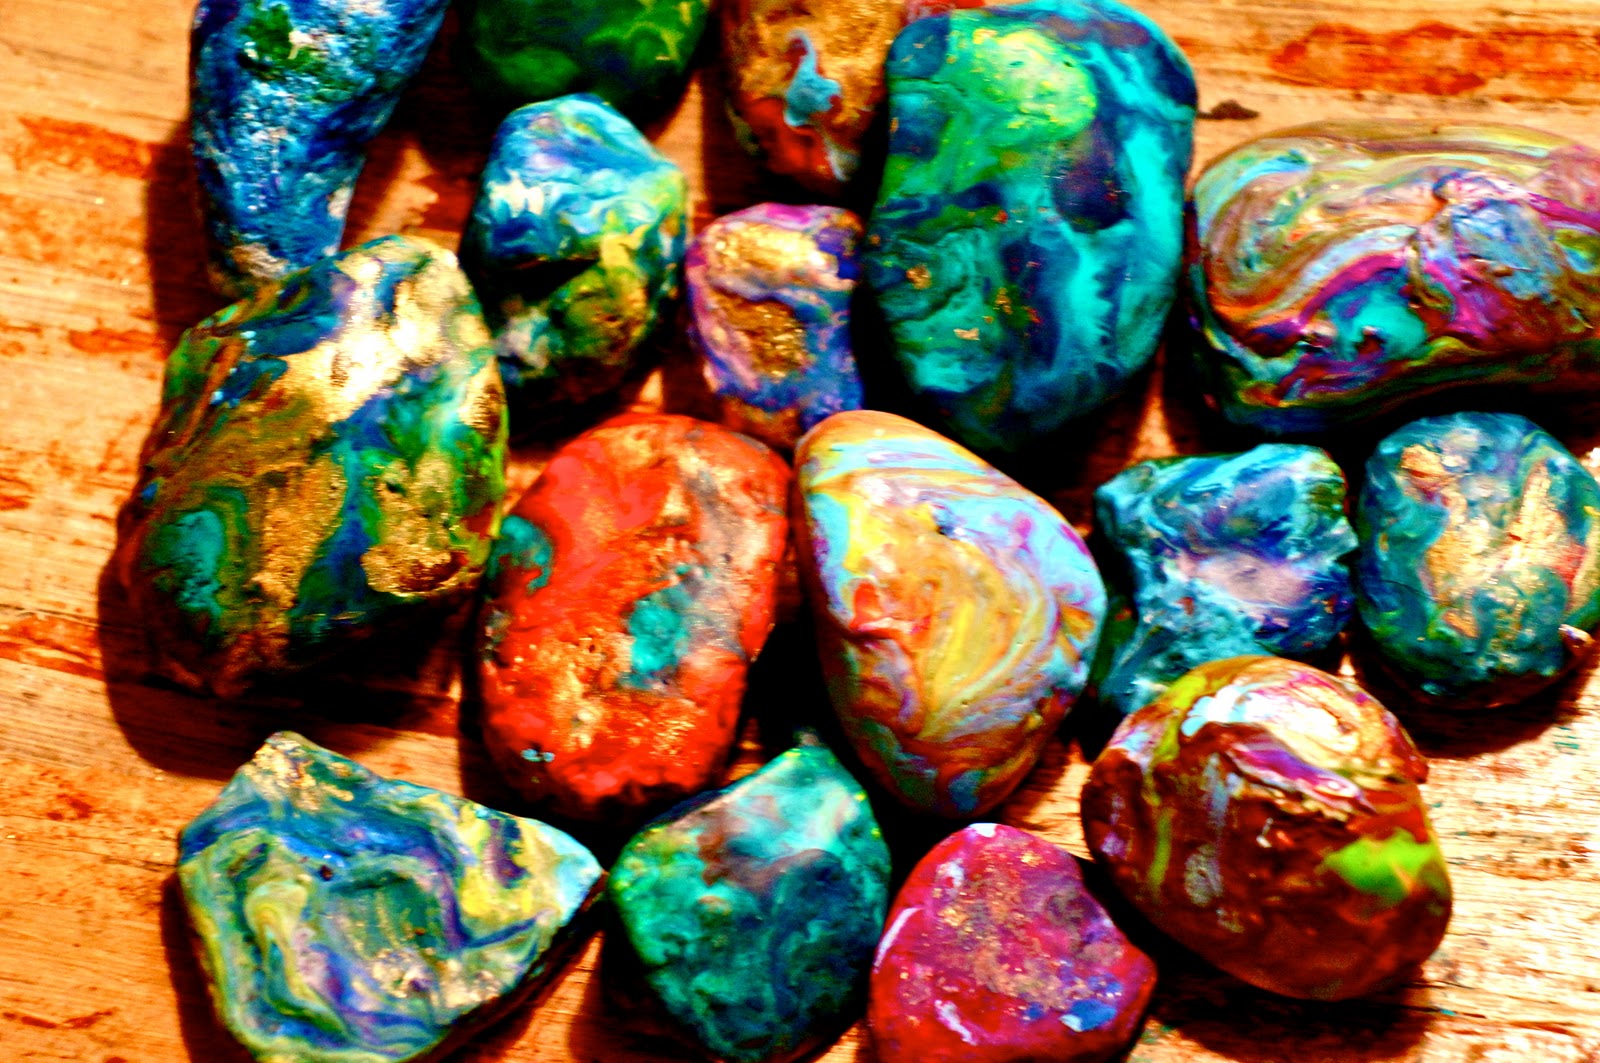
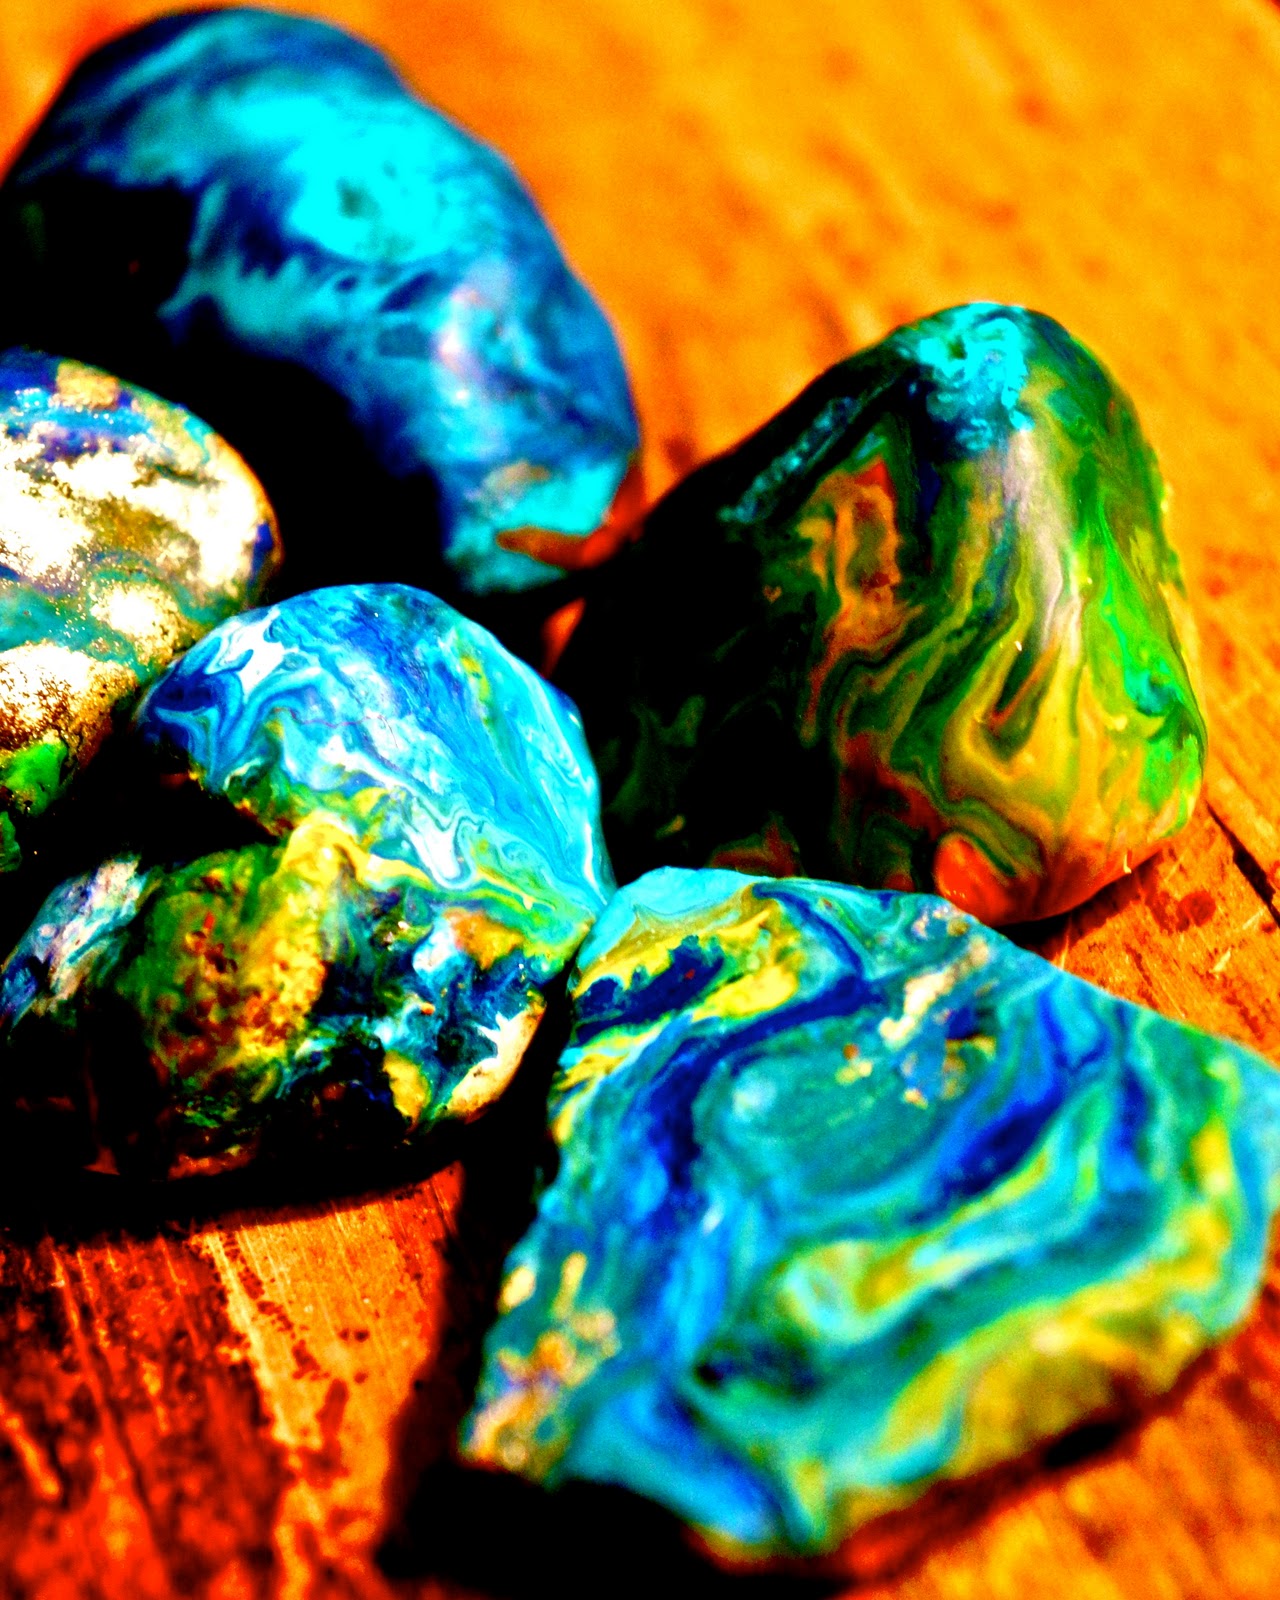
I love melted rocks. Melted rocks rock. I did this art activity with two 6 and 7 year old boys and I think I enjoyed it more than they did (probably because I wouldn’t let them touch the hot rocks…and you know how boys are…they only want to do what they aren’t allowed to do:) ). Something about the simplicity of the activity and watching the crayon melt and mix and swirl with the other colors is so relaxing.
You will need:
smooth rocks- pick out some rocks from your garden (preferably smooth rocks with flattened tops) or you can buy a bag of river rocks from a craft supply store for fairly cheap.
crayons- The Crayola brand work perfectly fine…I had some oil pastels I also tried using…a few of them worked, the more thicker and more expensive they were, the LESS they worked because they didn’t melt as easy and didn’t mix with the other crayons. ALTHOUGH, saying that, one gold oil pastel I had from Blicks art store turned out to be the best. So, try a few different types and experiment.
an oven- or access to one.
An oven mitts (those babies come out of the oven hot)
Foil paper
a large (and preferably old and well used) baking tray
Instructions:
Pre-heat the oven to 350 degrees Farenheit
Wash off and dry the rocks if you grabbed them from the garden
Peel the paper off the crayons you want to use
Put foil paper on the oven tray (to keep any melted crayons from getting on the tray)
Place the rocks on the tray and put them in the oven for at least 15 minutes (the hotter they are the better)
Take the rocks out using the oven mitt (if you are doing this with children make sure to warn them NOT to place their hands directly onto the rock because they will born themselves) and place them on paper plates or foil sheets
Put the crayon onto the surface of the rock and push down firmly for a few moments. Use several different colors to get a colorful effect.
Happy New Years!!!! I hope everyone had a fantastically memorable New Years Eve. Mine was definitely memorable but not so much fantastic. We listened to a really horrible 70’s cover band (in TIGHT COSTUMES!) and watched a bunch of surprisingly limber, but incredibly inappropriate drunk old women dance. Next year, I’m not even going to try. I will be at my house, with my husband and my dog; which is always what I wish I was doing when I am out on New Years Eve.
Anyways. Back to felt. fantastic felt! felt-tastic.
Felt. I love this stuff! I’ve been hearing a lot about felting crafts in the past few years- it seems to be what all the cool kids are crafting these days- but, as usual, I am running a little bit behind with the “trends” and have only just fallen in love with felt! And fell hard!
So I thought I would share this felt flower necklace craft that I’ve adapted from a couple of different crafters….I love Martha Stewart’s fabric flower necklace and have unsucsessfully attempted it several times but my flowers don’t look anything like Martha’s. And I KNOW for a fact that I picked up the felt flowers from some creative and inspiring crafter on the internet but I cannot find the website for the life of me! I’ll add the links in when I find them.
Making the felt flowers are super easy. All you need are felt squares, which come in so many different bright and fun colors (Michael’s has them for $.29 per 8 x 11″ sheet), permanant marker, craft scissors, tacky glue (the clear kind works the best) and random circular objects of various sizes! They come in so many bright and fun colors too. Just trace various sized circular objects and cut them out.
The next step is cutting the felt circle by cutting in a circular spiralliing motion. Then, starting from the inside, with the smallest circle, overlap the layers to create wider and wider circles. Dab some clear tacky glue every once in a while on sections of the felt and then a dab of clue and the ending tip to keep it together.
Once you have a good amount of completed felt flowers, (as you can tell from the above pictures of my felt flowers, I got a little OCD and made way more felt flowers than is needed), then you need to make the base of the necklace. I’ve used a kidney bean shape to create a curve around the neck, but you can do anything really.
Using needle and thread, arrange the flowers and sew them onto the backing. I also threw in some
colorful beads.
Thanks to my beautiful friend Mary who was nice enough to be my felt-tastic model!
 (all 6 dresses available on asos top left: ASOS RED CARPET Premium Embellished Midi Dress With Plunge Front $227.40, top middle: Asos Midi Wiggle Dress in Paisley Print $113.17, top right: ASOS Baroque Embellished Midi Shift Dress $161.08, bottom left: Self Portrait Lucille Midi Dress $473.75, bottom middle: ASOS Petite Wiggle Dress with Wrap Back $85.28, bottom right: ASOS Gray Floral Drape Back Midi $94.75)


 A split sided basic top is perfect to throw over a midi because it covers my least favorite areas (my tummy and the booty) and I like the look it creates.


